Thursday, January 14, 2010

jazz up your applications in 2010


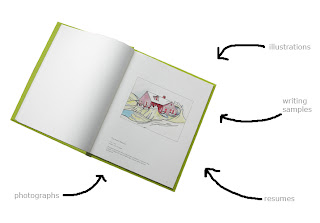
If you're searching for jobs or applying to grad school programs and you want your application to stand out from the rest, what better way to catch their eye than presenting them with a striking personalized portfolio loaded with your credentials. When they open the package and see your name emblazoned on the cover of a professionally made portfolio they will know that you are serious and are sure to remember your name. There will be a lot of information inside the portfolio that needs to be the real star of the presentation so keeping the portfolio design clean and simple is the best choice in this case. Choose colors that say something about yourself, your work, or even the institution that you are applying to. There are 11 fonts available in a variety of sizes and styles that can be used for personalizing your portfolio. For a subtle approach, a blind emboss of your name in the bottom right corner of the cover would be a great choice. If you want to add some color and make your name stand out a bit more, then choose one of the 10 colors available and opt for a dead center or optical center placement. All of these options are available in the online store at www.kdbooks.com.

Monday, January 11, 2010

FONTS & COLORS


Take a look at these new fonts & colors available for personalizing your custom portfolios and boxes. There will be more embossing and foil stamping options added throughout the year so check back often.

Wednesday, January 6, 2010

Happy New Year

I am excited to announce the launch of a new online store at kdbooks.com. It offers a large selection of semi custom screw post portfolios, ring binders and presentation boxes. Each design is available in a number of standard sizes and can be customized by making selections from various drop down menus. At this time there are 20 bookcloth colors to choose from however many more will be added in the near future. A portfolio can be covered entirely in one color or a second color can be chosen for the inner liners. Each structure can also be customized by adding any number of pockets or personalized with embossing and foil stamping. Take a look at the new site, your feedback will be appreciated.

Friday, October 23, 2009

Big Box

This is the largest box I've made to date and I'm really excited about the possibilities it has opened up. I had always seen the 38" x 26" dimensions of the bookboard as the limit. After watching a home improvement show about how laminated plywood beams are made I decided that more than likely those limits didn't exist. For each of the 11 pieces that make up the structure of the box, I cut 4 strips of .059 bookboard and laminated them, overlapping the seams of each. The box measure 42" long, so I used one piece of 38" and one piece of 4 1/2" and reversed the placement on each layer. After the glue had dried I trimmed the ends down to the proper length. This produced a super strong and stable piece of bookboard that I knew could support the weight of the finished box. Since the box is so large it was important to build it with 1/4" walls, standard 1/8" walls would have made for a very flimsy and unwieldy structure. Trimming the pieces was a bit tricky. As with the pieces of any box it is so important that they are cut at perfect 90 degree angles through their width. 1/4" thick pieces do not fit into the board cutter so they are all hand cut. It takes a real steady hand and perfect attention to keep the blade straight when cutting through that thickness. Once all the pieces were finally trimmed and glued, I covered the box in a lime green linen cloth and lined the trays with a deep wine colored Dupioni silk. I really like this color combination and am very happy with the finished product. I'm looking forward to applying this new technique to the creation of some unique and impressive custom portfolio and presentation pieces.


Monday, October 5, 2009

NEW STUDIO

I am very excited about my recent move to a much larger studio. It feels good to spread out and have more space around my equipment. I'm still trying to get everything in order and figure out the best way to use the space. More than likely I'll move things around before I'm satisfied but here are some photos as things are for the moment. I'm looking forward to taking on some new, exciting and larger projects as the year winds down.


Thursday, September 24, 2009

Photographer's Portfolio

Long Beach photographer Wes Kroninger found me through this blog and was surprised to find that I was only 1 mile from his office. After a few visits to my studio and some time living with fabric swatches and foil stamping samples, Wes decided to go with a black hidden screw post portfolio and slipcase set with a subtle foil stamped logo in the bottom right corner. The foil stamping turned out great. Since the letters in his logo had plenty of space between them, I was able to use 2 different colors with just one die. The grey inner liner behind the pocket matched well with the logo and connected the outside and inside of the presentation together. I really like the the matte black "WK" that Wes chose to put on the portfolio's spine. It's these very small details that often make all the difference.

You can visit Wes Kroninger's website here and his blog here.


Tuesday, August 18, 2009

Unrequited

This was a fun project but I have to say I was a bit hesitant when my client said that he wanted his book printed on parchment. The thought of cutting, folding and stitching animal skin made my pescatarian stomach a bit uneasy, but I decided I was up for the challenge.

After the book layout was complete, the paper was purchased from Pergamena in New York, sent out to a printing company that specializes in printing on parchment and then shipped to me in Long Beach. When it arrived at the studio, I cautiously opened the package and was surprisingly delighted at what I saw. Each page was unique and beautiful with varying textures and colors, no two were alike.

Of course working with parchment is nothing like working with paper so it was a learning process, fortunately a smooth one. Each sheet had to be trimmed carefully as the printing was not consistently in the same place on each sheet. Then each sheet was scored, folded and pressed overnight. Next the signatures were collated, station holes punched and finally the book block was stitched, glued up, pressed again and then into the guillotine for a final trimming. The client wanted suede endsheets with a decorative border stitching. He also wanted the endsheets to be one continuous piece so I cut the suede to fit the bookblock, ran it through the sewing machine for the decorative stitching and then stitched the suede wrap to the bookblock.

The raised ligature on the front cover was hand cut and then carefully covered in a dark brown leather. The book's title, "Unrequited" was foil stamped on the spine in 22K gold on the Kwikprint and finally the bookblock was cased in, pressed for a few days and turned over to a very happy client who then passed the gift on to it's intended recipient.